Step By Step Discussion
Navigate to Dashboard > Products > RnB Extra Fields. Here, you can generate additional fields that will be accessible on the product page (ensure these fields are linked to a specific product). Let's explore the process of creating and linking fields to products.
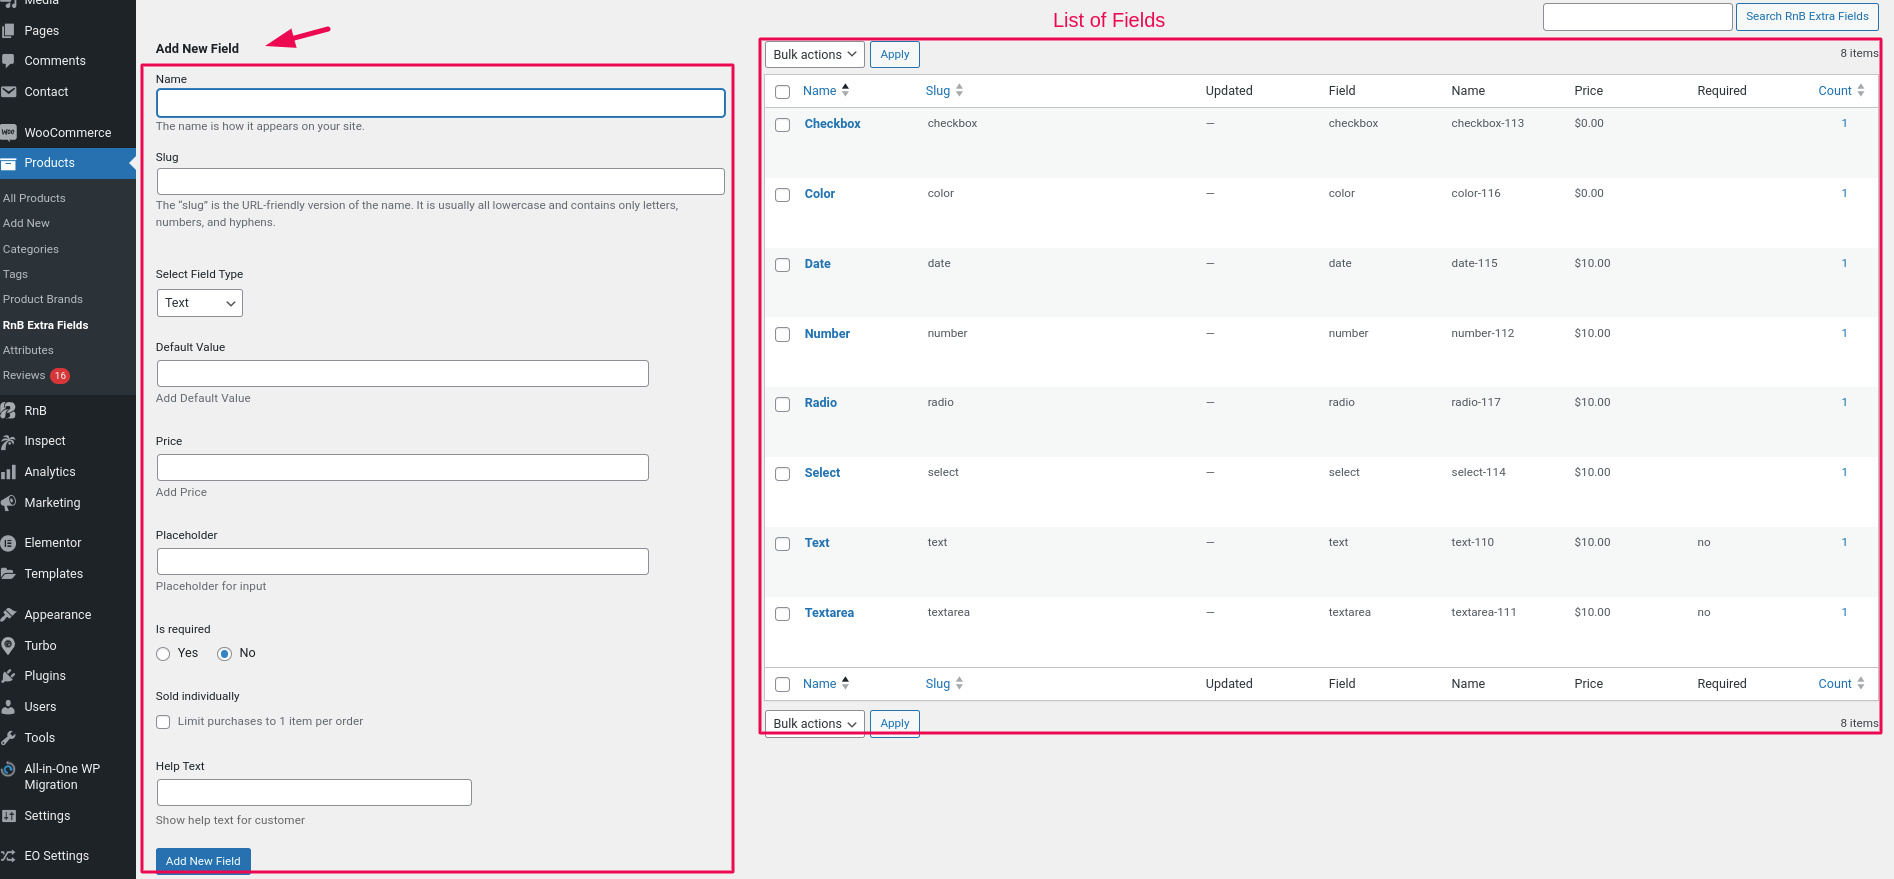
- Name: Enter the desired name, which will serve as the field label.
- Slug: This is automatically filled upon field creation. It is optional and can be left blank.
- Select Field Type: Choose from a dropdown list of available field types. In this case, select Text.
- Default Value: Set the default value for the field being created.
- Price: Specify the price associated with this field type during the product checkout.
- Placeholder: Enter the placeholder value for the field.
- Required: Determine whether the field should be mandatory when adding the product to the cart.
- Sold individually: Enable this option to sell the field individually with each order.
- Help Text: Provide a help text for the field type, visible after the field.
Once you have entered the values for the above fields, click on the Add New Field button. The field type will be created and displayed in the list table on the right (Follow the same procedure to create others available field types). Now, it's time to connect this field to a product. Let's proceed.
Navigate to Dashboard > Products > Add/Edit Product. In the right sidebar, you will find the RnB Extra Fields section. Please see the attached image for clarification.
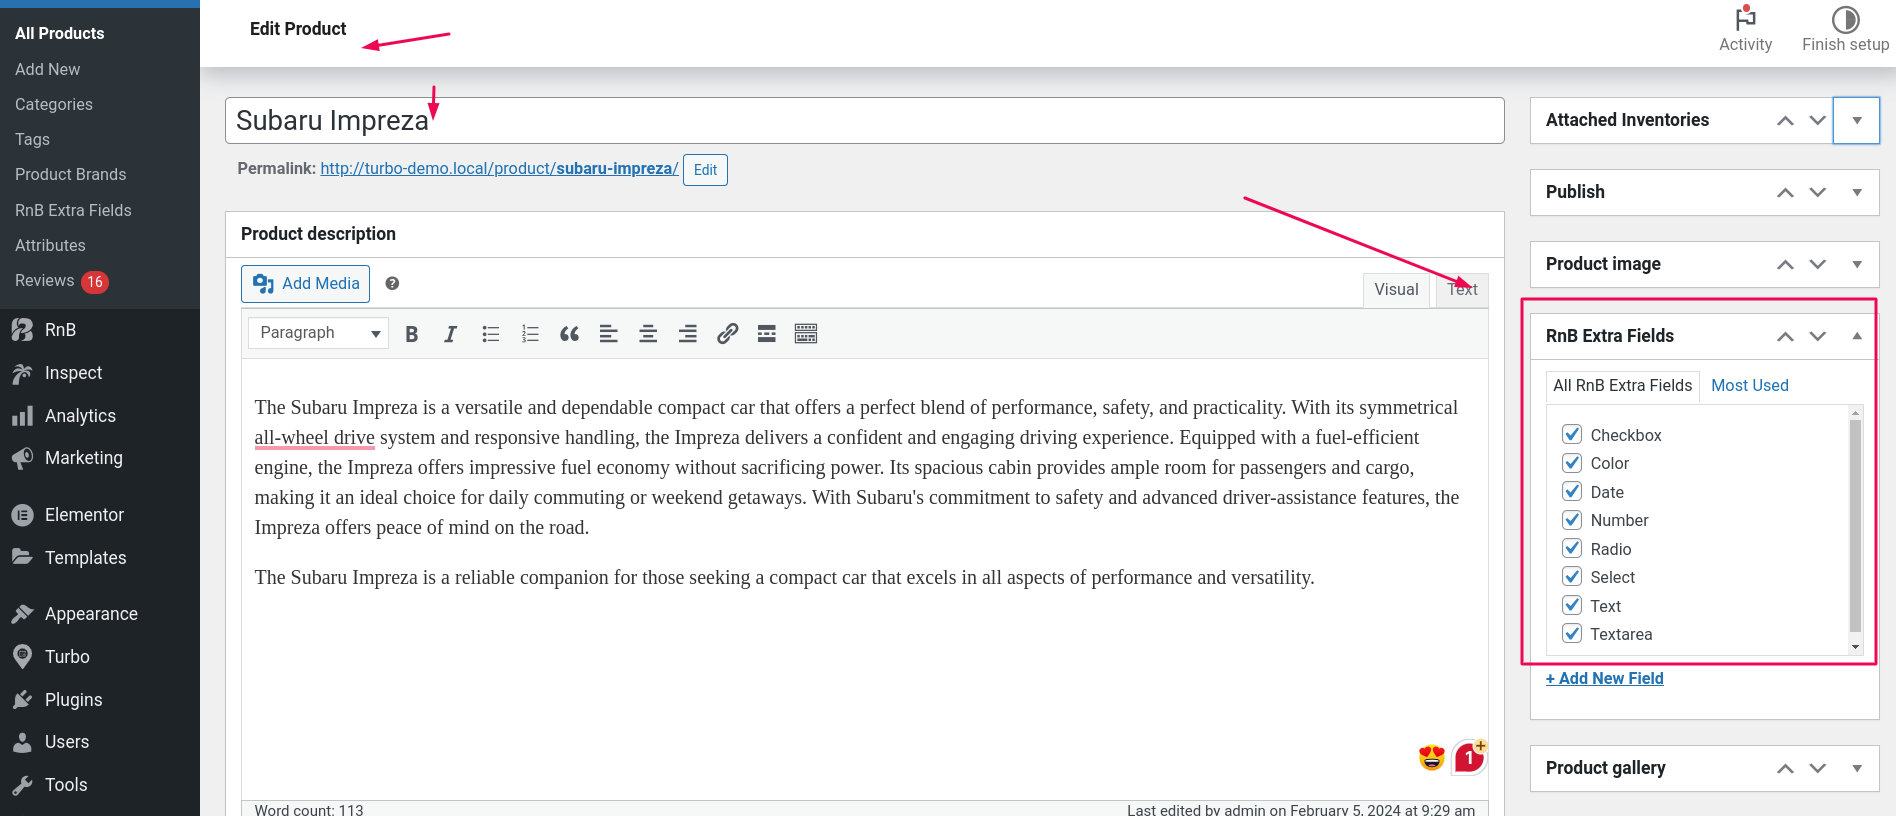
Now, check the box next to the field type that you wish to associate with the corresponding product. In my case, I have selected all the fields I have created.
The product page should display the following output view for this field type.
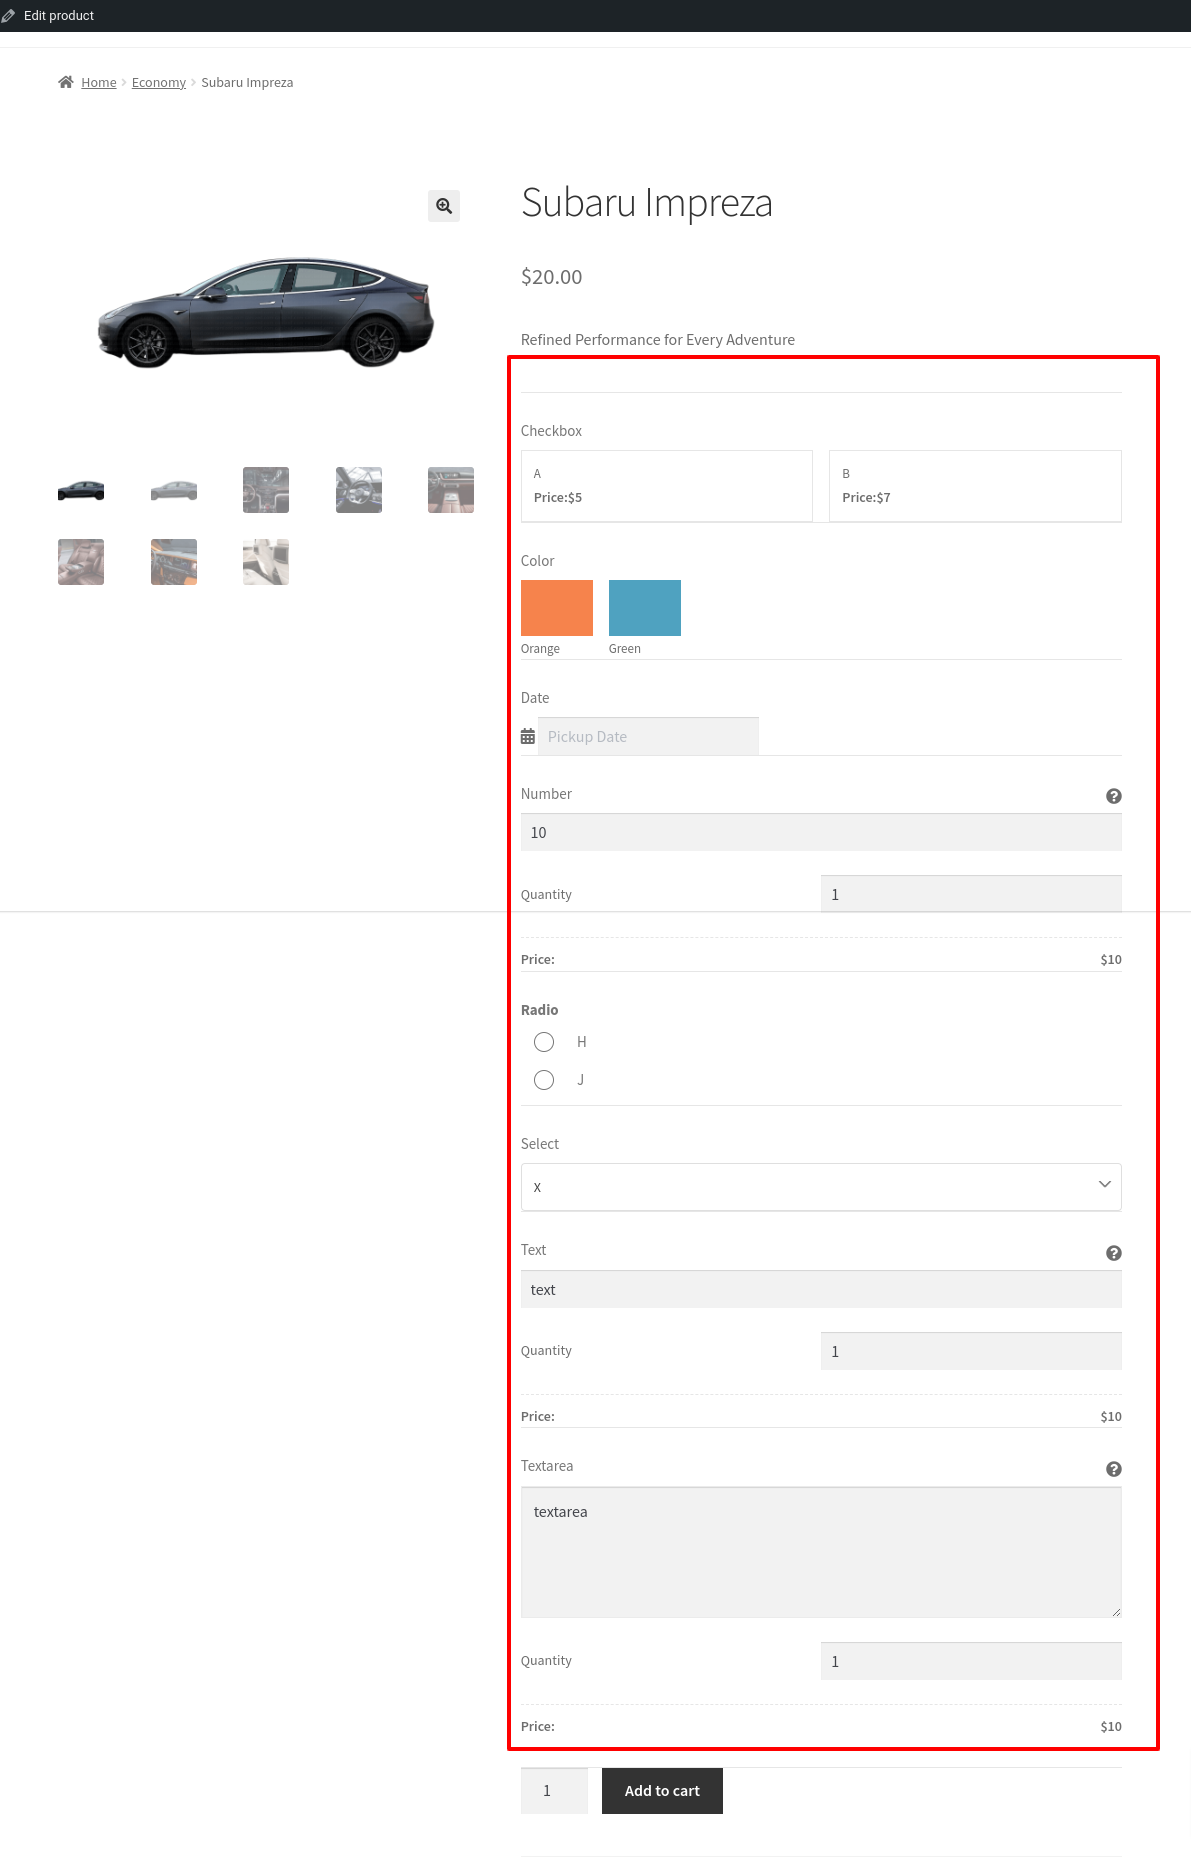
That's it.